Using Polkadot Vault Hydration
Polkadot Vault is a mobile app which turns your iOS or Android device into a dedicated hardware wallet for Polkadot, Kusama, and any other Substrate-based chain. It allows you to keep your private keys offline while still being able to conveniently sign transactions in an air-gapped way using QR codes.
01 Set Up Parity Signer
00 Before You Start: Stay Safe
00 Start clean
Before installing Parity Signer, make sure that your phone is in a clean state. If it has been used, perform a factory reset and do not install any other apps besides Parity Signer.
01 Don’t Insert Sim
If possible, don’t turn on WiFi or use a secure WiFi connection, preferably with no other connected devices and a reputable VPN provider to connect, update the device, and install the Parity signer app.
02 Use Strong Passwords
For robust security, use long passwords for the device and the accounts you need to create to use it.
03 Setup New Account
Don’t use your old google ID or apple ID, create a new one specifically for this use which will be used only to download updates and parity signer. In case of Android device it’s better to not use WiFi or google account at all. We recommend using some sort of OS that encrypts your data like Lineage O.S. If an email is required, create a new one. Alternatively, you can create new apple id and email on iOS.
04 No Biometrics
Avoid fingerprint scanners, face ID, or shot numeric codes as they are exploitable. Use a strong password instead.
05 Disable All Signal-receiving Features
Use airplane mode and make sure to disable all of these features manually. If you are on an iOS device, turn it off and ask to auto-join networks and hotspots in the WiFi settings. Including:
- Location services
- WiFi (if required to upgrade or setup, disable right after the update)
- Bluetooth
06 Logout From All Accounts
Log out from App stores, iCloud, and any other accounts you’ve joined.
07 Updating Your Device
If you are using WiFi to update your device, remember to disable it right after the update and use it only in a secure environment, preferably through a secure and encrypted VPN channel. After the update is complete, forget the WiFi network to make sure you don't automatically rejoin.
01 Install Parity Signer
Install Parity Signer from the official app store for your device (iOS / Android).
Make sure that the application you are downloading has been published by Parity Technologies.
02 Create a New Account
To create a new account, follow the steps below.
01 Add Seed
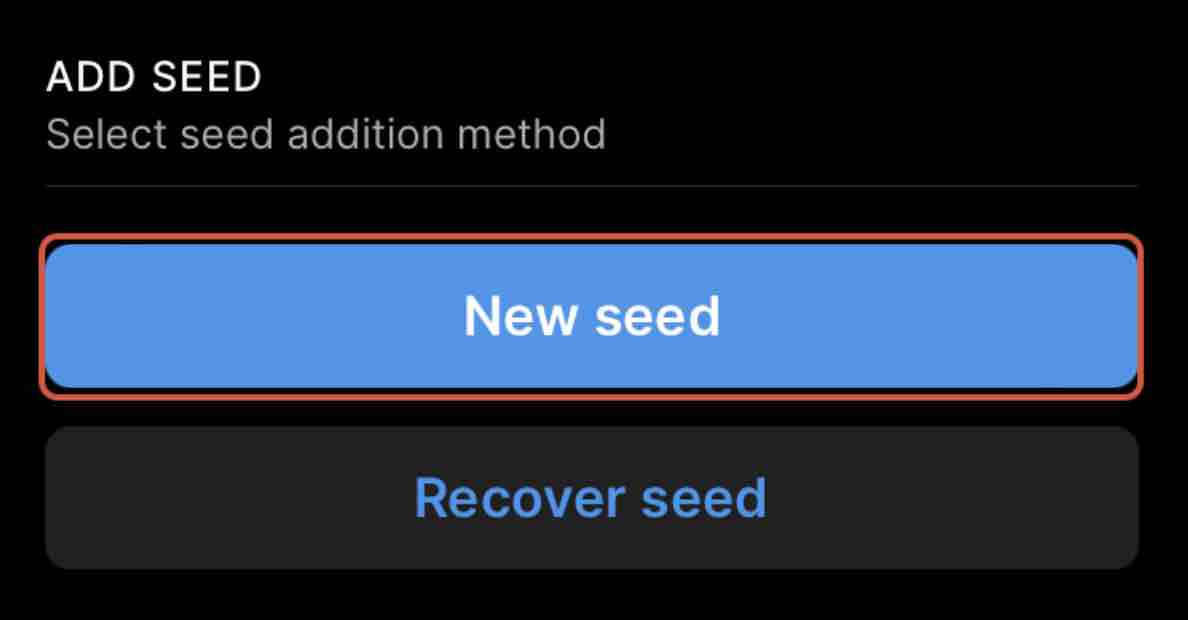
Open the Parity Signer app and select New seed.
02 Back Up your Recovery Phrase
The app will display your recover phrase. Write it down and store it in a safe place.
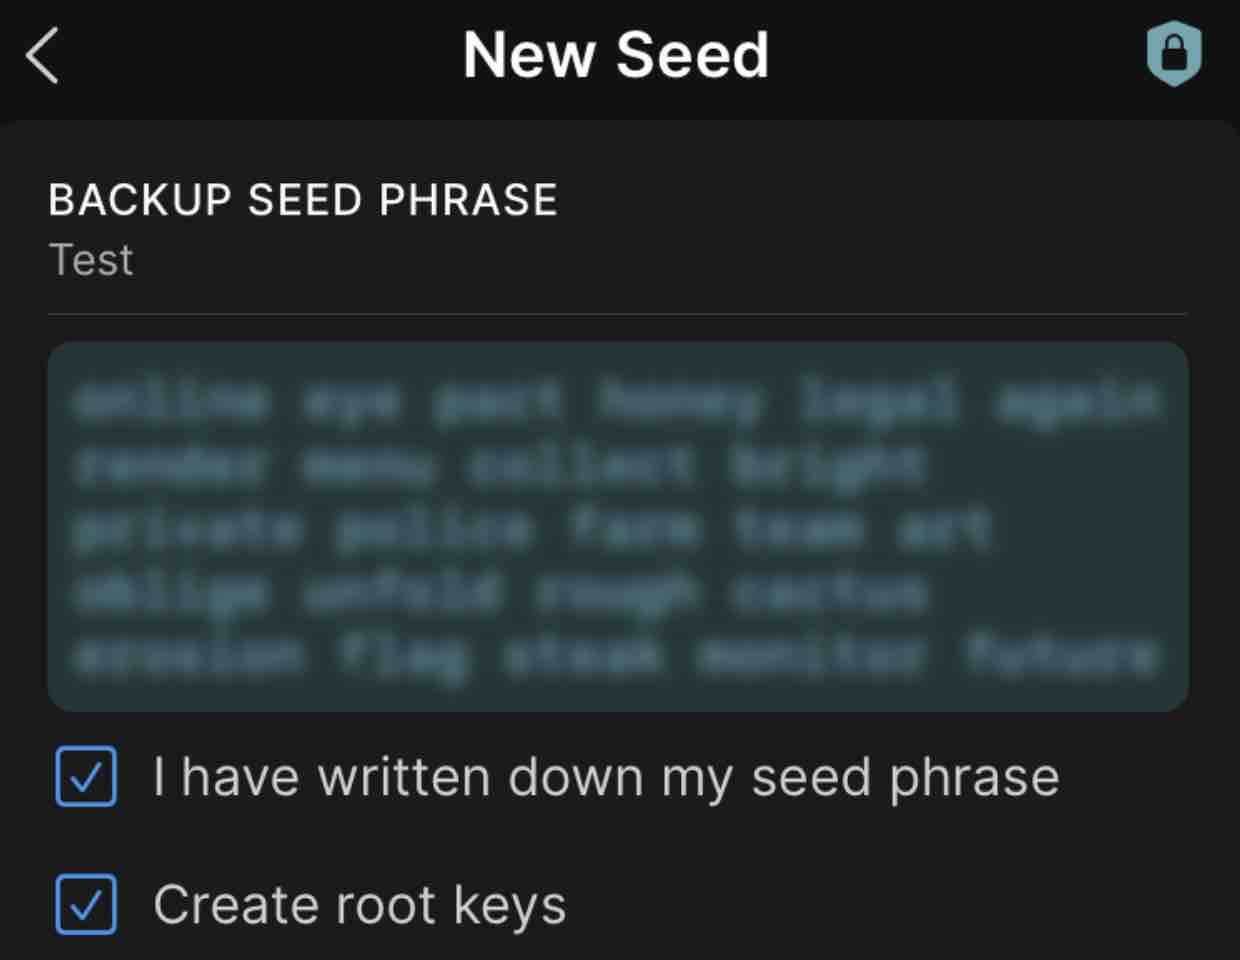
After completing this, you are all set to go! You can use your phone passcode or authentication method (fingerprint / face id) in Parity Signer.
Stay safe!
Anyone with your seed phrase can access your funds, and there is no recourse for someone stealing your seed phrase.
To protect your seed phrase, consider the following tips:
- Never store your seed phrase as a digital file on any device.
- Always write down your seed phrase with a pen and paper.
- Store the paper with your seed phrase on it somewhere safe.
- Never give your seed phrase to anybody, including support staff.
03 Connect to Polkadot.js/apps
Optionally, you can add your Parity Signer account into the Polkadot.js browser extension which will allow you to view your balances on the Polkadot.js/apps accounts page and to sign transactions more easily.
On Polkadot.js/apps
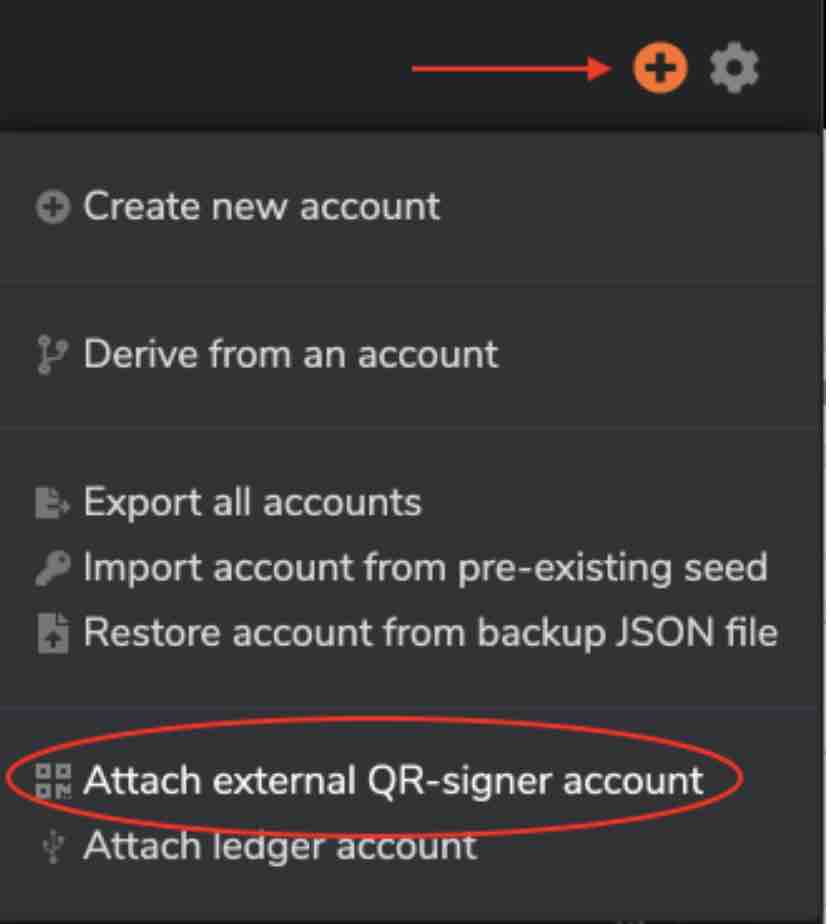
To add your account, open the Polkadot.js browser extension, click on + and select Attach external QR-signer account.
On Parity Signer
- Open
Keystab in the bottom menu; - Select the network you will be using from the dropdown menu next to chain;
- Select your desired account or sub-account;
- You will see a QR code which you need to scan with your device camera.
04 Add Hydration Chain
To use Parity Signer, you first need to add a new chain to Parity Signer. If you want to use Parity only for Polkadot or Kusama, you can skip this step and proceed with updating metadata. To add a new chain, you need to scan a QR code with base information about the chain.
01 Get Chain Specs
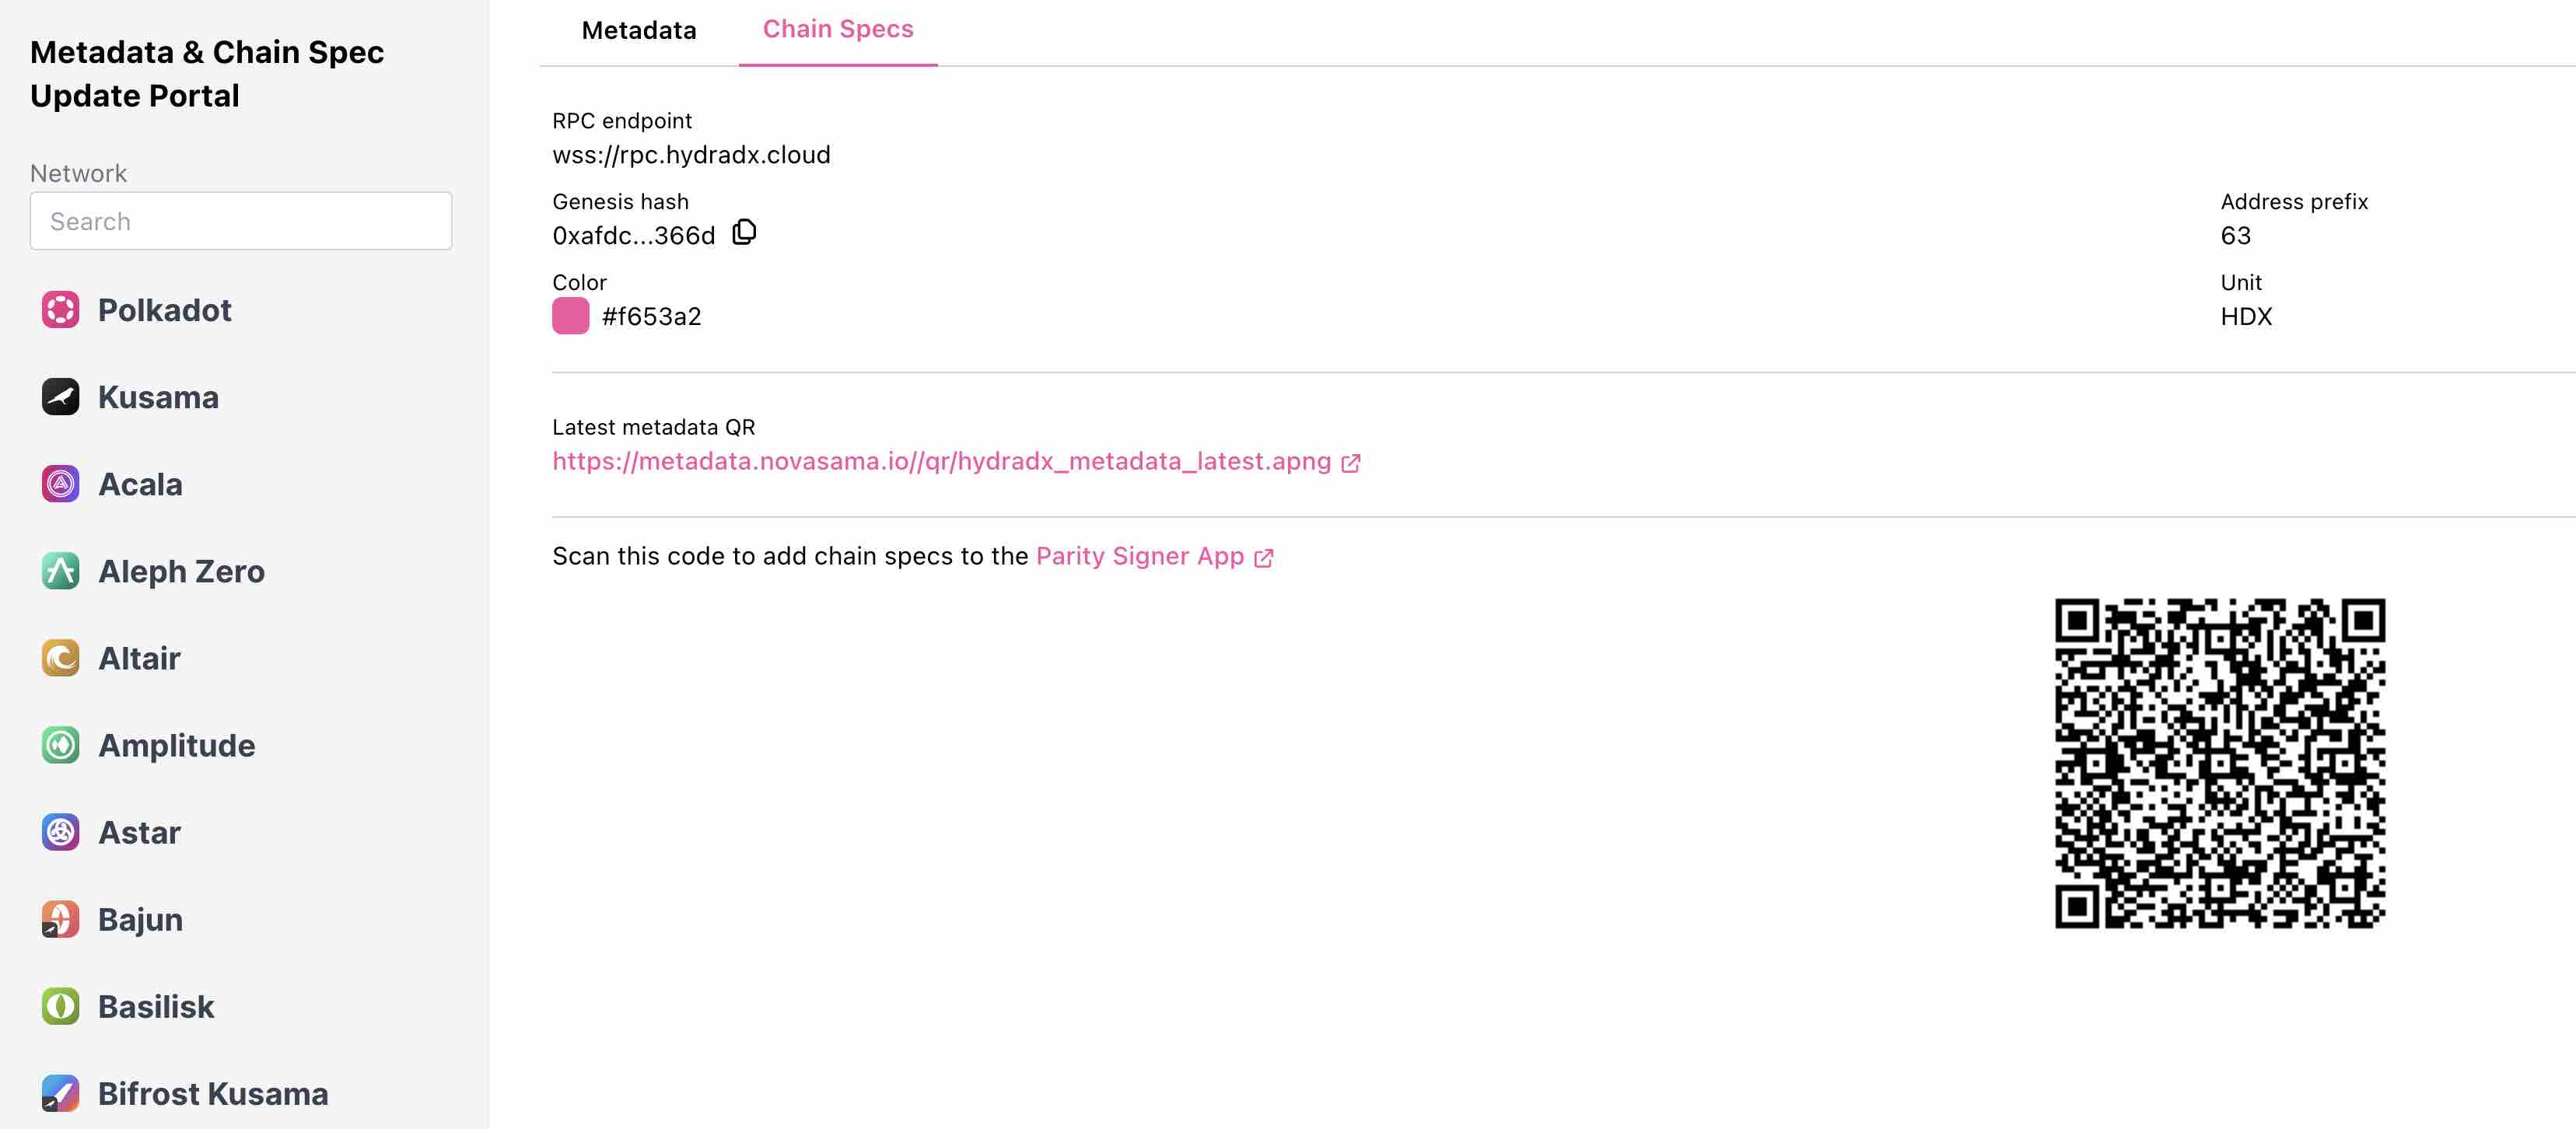
On your Desktop, navigate to https://nova-wallet.github.io/metadata-portal/ and select Hydration as the desired chain. After that, click on Chain Specs.
02 Add Specs
On your Parity Signer, click Scanner, scan the QR code and click Add new chain.
02 Use Parity Signer
Always make sure you are scanning a QR code signed by a trusted verifier.
01 Sign a Transaction
To sign a transaction from your parity signer, we recommended adding it to polkadot.js extension for ease of use. Until more chains can work with Parity Signer directly, it will be the most convenient way to use it inside applications on your desktop.
When signing a transaction using your Parity Signer, Polkadot.js/apps will display a QR code.
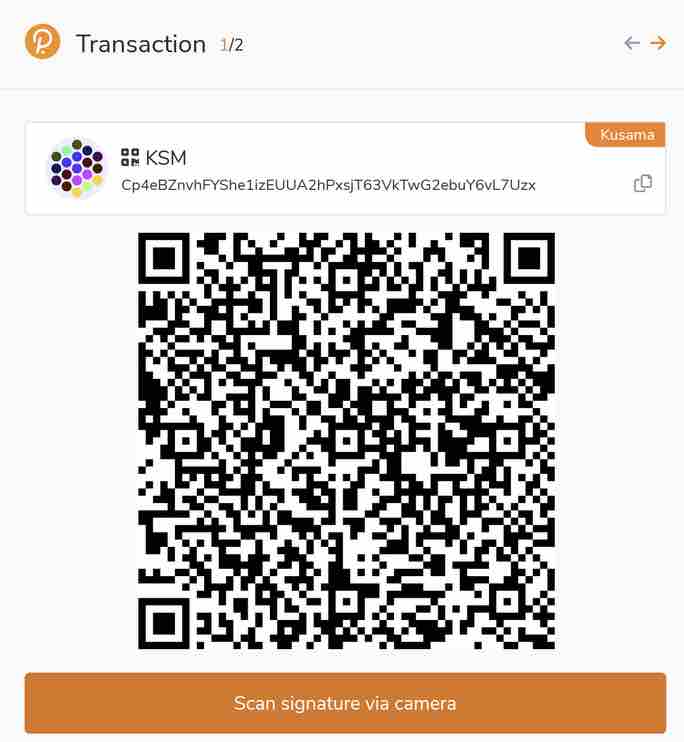
Scan the QR code using Parity Signer and click on Unlock key and sign.
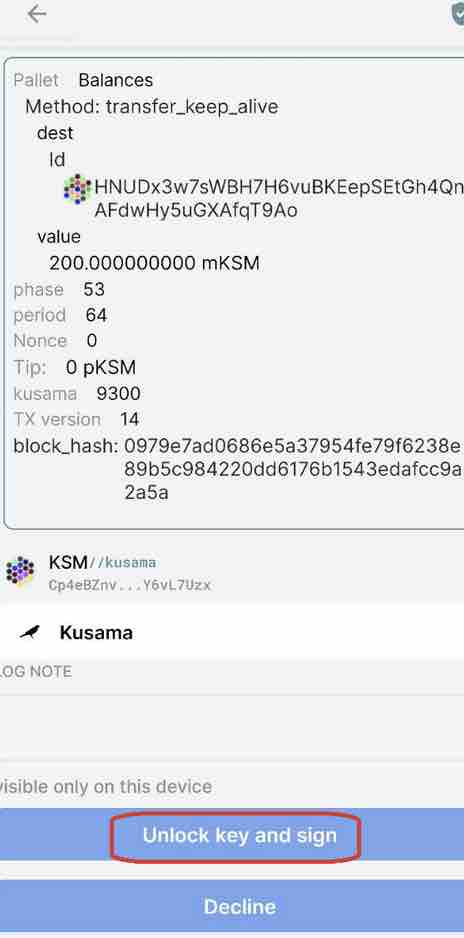
Your Parity Signer will now display a QR code. To complete signing the transaction, switch back to Polkadot.js/apps and click on Scan signature via camera.
02 Update Metadata
To use the Parity Signer, you require the latest metadata for decoding transactions in the Parity Signer. You can acquire the metadata by scanning a multi-part QR code containing this data, allowing the Parity Signer to decode the actual transaction and display it correctly before you sign. This step is similar to updating your ledger application.
01 Get Metadata
On your Desktop, navigate to https://nova-wallet.github.io/metadata-portal/ and select the desired chain. After that, click on Metadata.
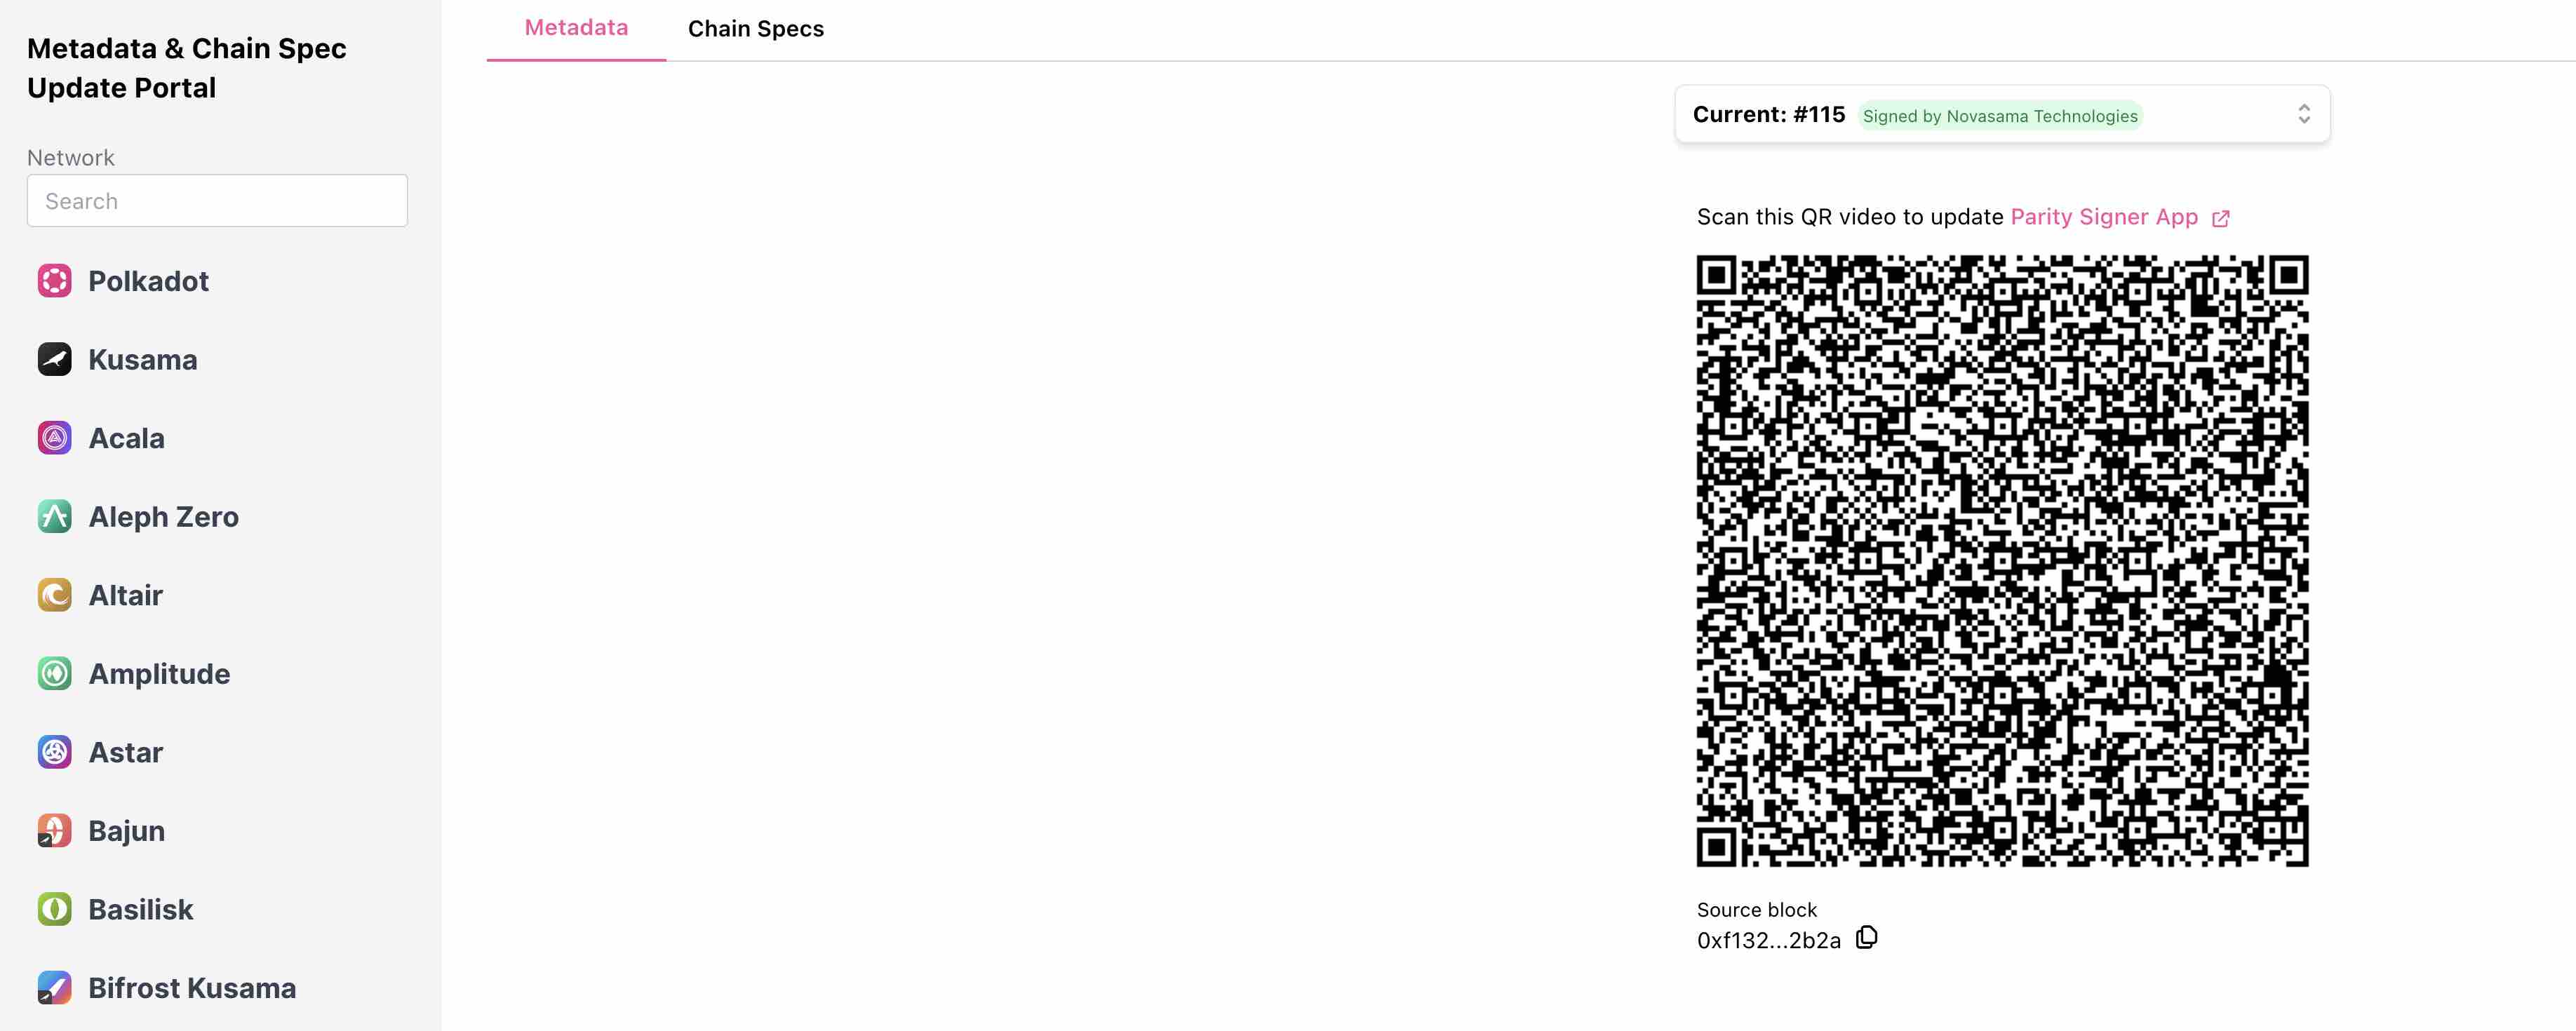
02 Update
On your Parity Signer, click Scanner, and update the Metadata by scanning the QR code