Participate in OpenGov
The Referendum Process
Before proceeding with making a referendum, identify the right track and origin for it. For instance, if the referendum is for requesting funds from treasury, select the treasury track with appropriate spend limits. Read this post to learn more about Origins and Tracks.
Below is the ideal process to follow:
- Create a discussion post about your proposal on Subsquare. This post allows the community to deliberate and recommend improvements.
- Create a referenda on Subsquare.
That said, you are free to create a referenda without first creating a discussion post.
How to Create a Discussion Post
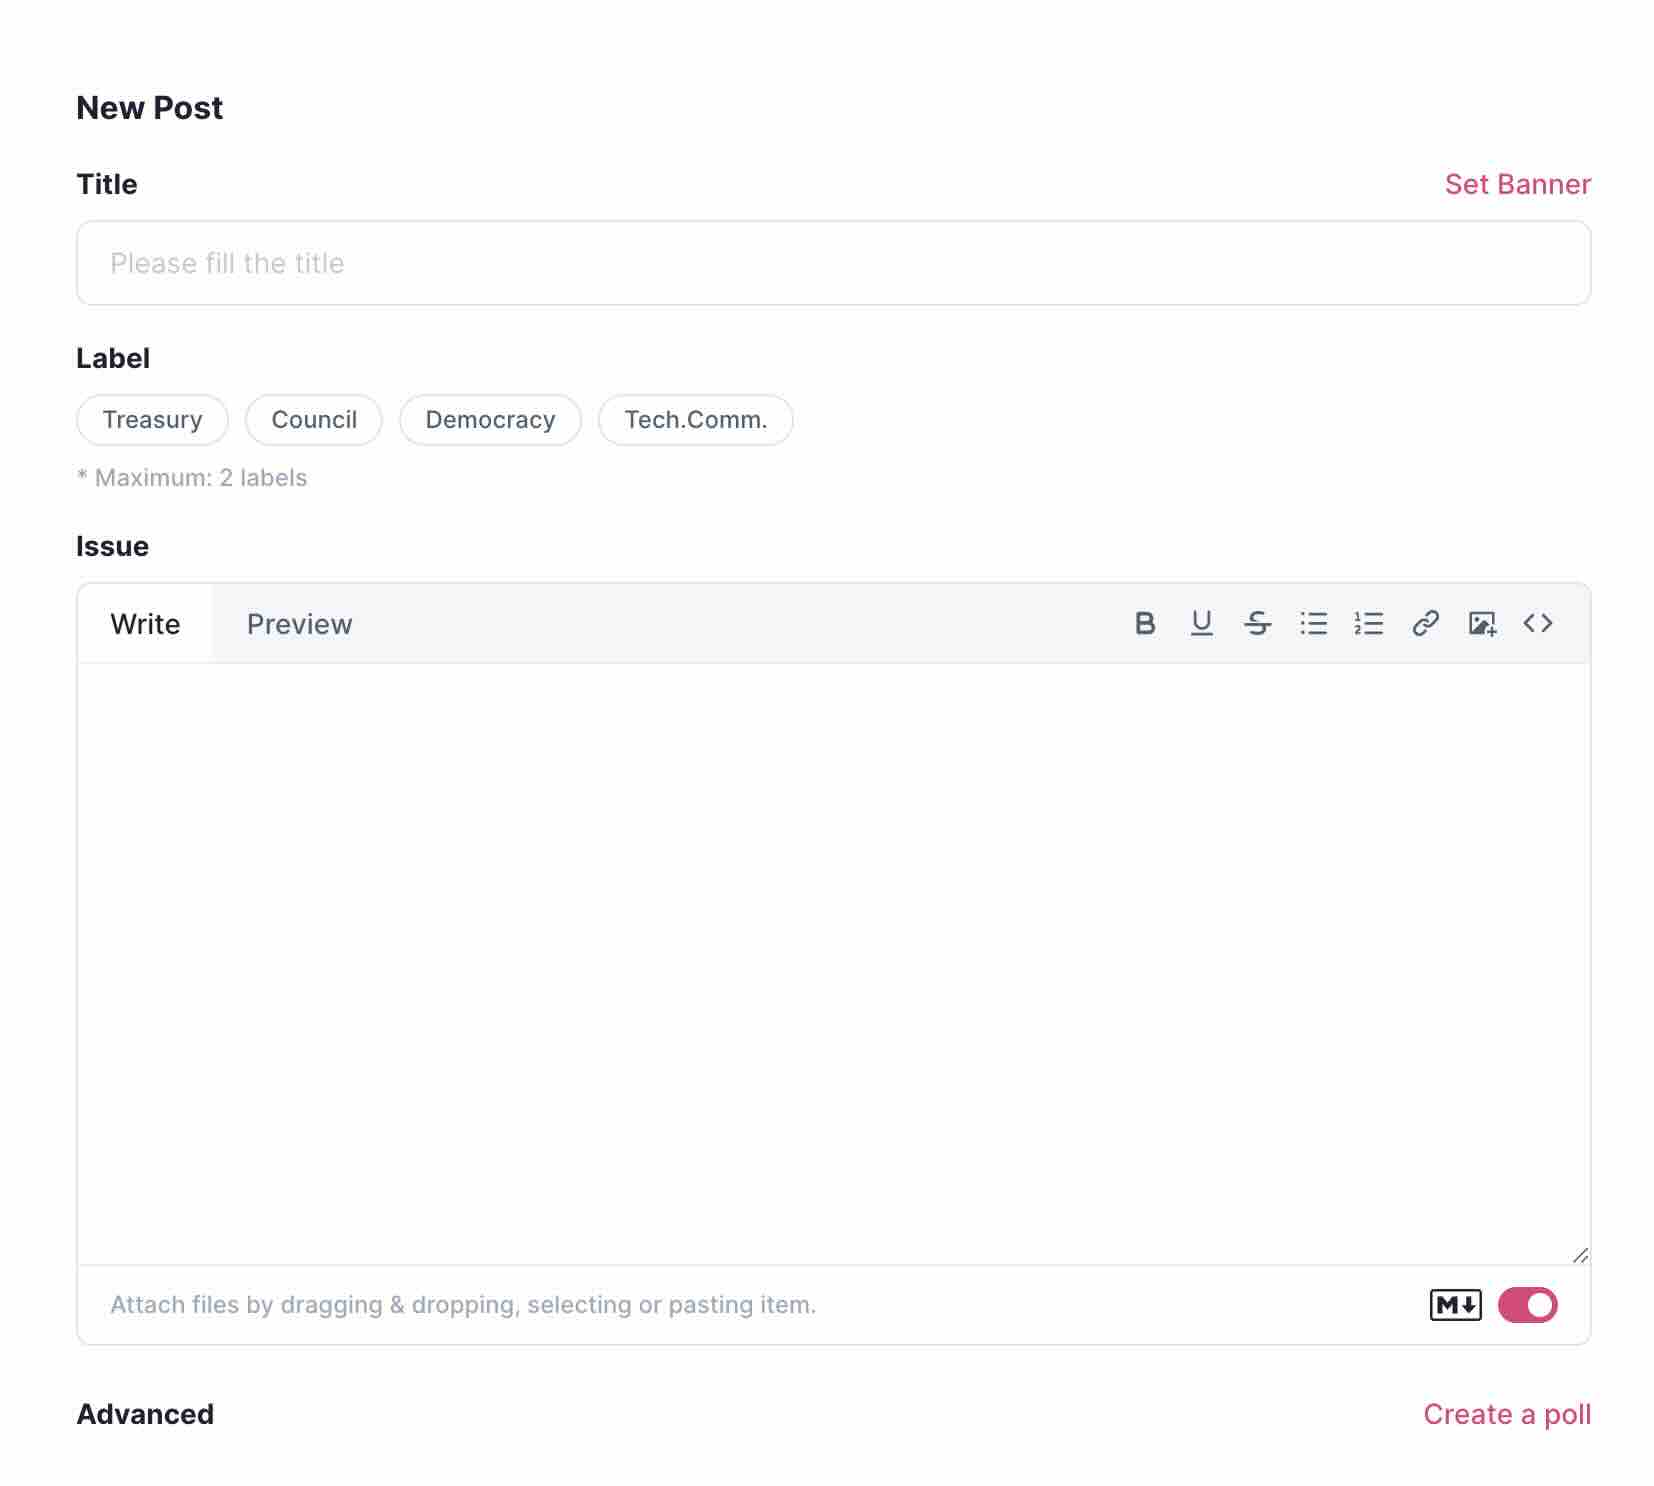
- Go to Subsquare > Discussions > New Post. You can do so following this link: https://hydration.subsquare.io/post/create
- Fill in the title, label, and description of your proposal.

- Click ‘Create’ and sign the transaction.
Having created a discussion post for your proposal, you should share the link to the post on community channels and your socials. The goal is to get feedback from the community and also give you an opportunity to address any concerns raised.
How to Create a Referendum
It is advisable to create a discussion around a proposal before making a referendum. This increases your chances of getting your referendum passed as you will get a chance a to listen to and act on community feedback and concerns.
-
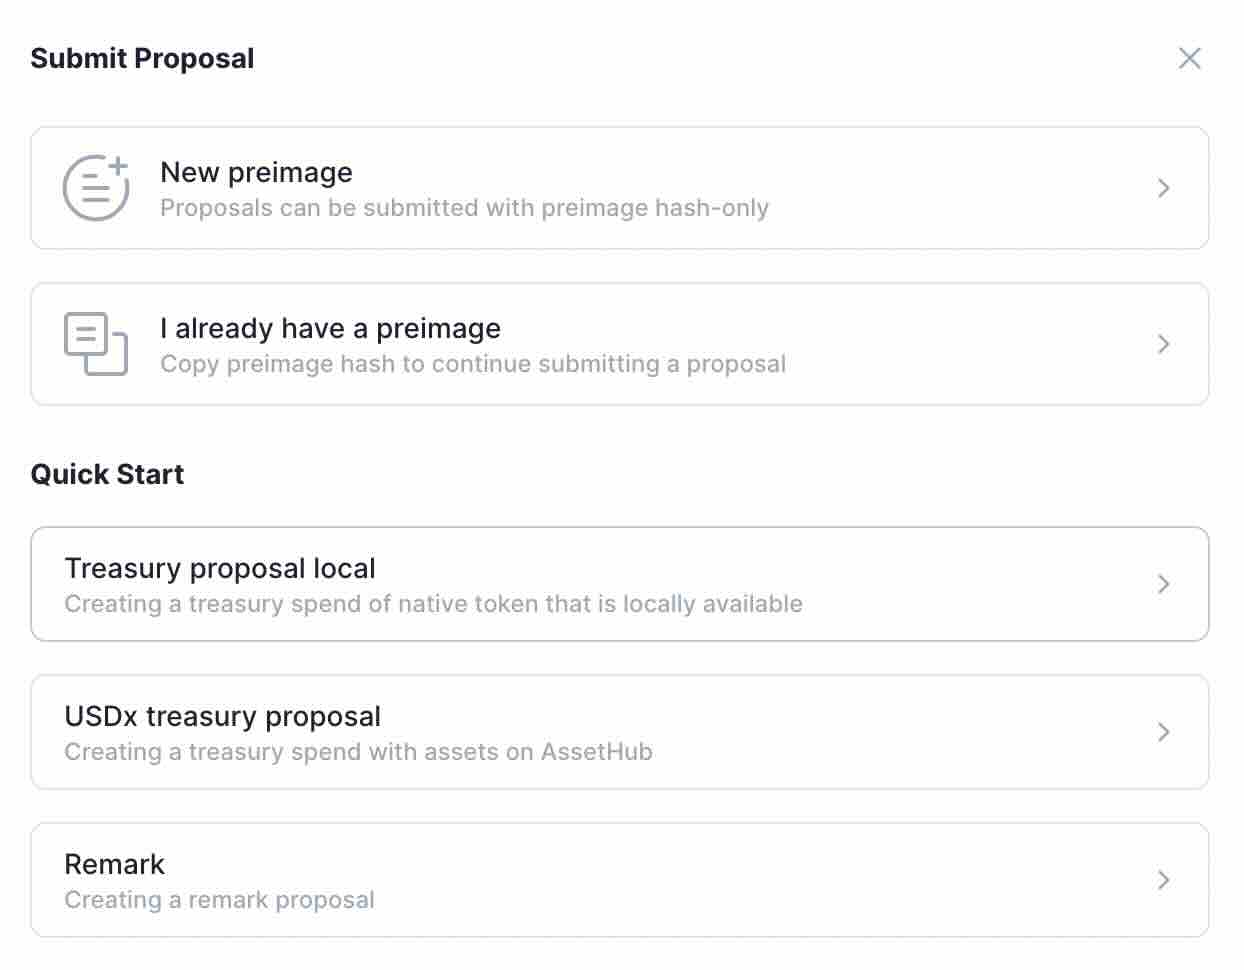
Go to Subsquare > Referenda > New Proposal https://hydration.subsquare.io/referenda
If you are familiar with creating preimages, then go ahead and choose any of the two main options (New preimage, I already have preimage).

- If you do not know how to use preimages, then select one of the Quick Start options that best fits your proposal. Below are the options:
- Treasury spend local - for proposals that want to request HDX.
- Treasury USDx spend - for proposals that seek to request USDC/T.
- Remark - for proposals that wish to propose changes to the protocol/ecosystem. most ideal for the ‘Wish for Change’ track.
- In the following dialog box, enter all relevant details. It is important to specify the correct track for your proposal. Once done, click ‘Create Preimage’ and sign the transaction. This will create your proposal/referendum. But note that until you pay the Decision Deposit, this referendum is, in a sense, inactive since any votes won’t count. At this stage, there are two things you need to do.
- Add contextual information. You can do this by editing the referendum to add the information. Or you can link to the discussion post you created before.
- Pay Decision Deposit. Click the Decision Deposit button on the ’Status’ dialog box of your referendum page. Enter the required HDX and sign the transaction.
At this point, your referendum is now fully created and available for voting.
How to Vote on Referendum
- Go to the referendum page on Subsquare.
- Click the ‘Vote’ button. This will bring up a dialog box.
- Choose your vote from 4 options
- Aye
- Nay
- Split - for when you wish to vote Aye and Nay.
- Abstain - for when you feel unqualified to vote on a proposal but want your tokens to count towards the Approval and Support parameters that determine whether or not a proposal passes. For more details on what this means, read this post.
- Enter the HDX value of your vote.
- Enter your vote’s conviction multiplier. The higher the conviction, the longer your HDX is locked and the more power your votes have. To learn more about conviction multipliers, read this post.
- Click ‘Confirm’ and sign the transaction.
You have successfully voted.
How to Cancel or Kill a Referendum
To learn more about cancelling and killing a referendum, read this post.
- Go to the Polkadot-JS UI.
- Ensure you are on the Hydration network. If you are, you will see the Hydration logo at the top left corner of the page. If you see a different logo (for instance, Polkadot), then click that logo and it will show a drop down menu. Scroll down to Hydration, select a server, and then scroll up to click ’Switch’.
- Navigate to Governance > Referenda.
- Click on the "Add Preimage" button.
- In the ’Send from Account’ dialog box, choose the account you want to use.
- In the ‘Propose’ section, select ‘Referenda’ from the drop down menu.
- Beside the ‘Propose’ dialog box, specify the action you wish to take.
- If you wish to Cancel the referenda (stop the referenda without slashing the decision deposit bonded by the proposer), then select ‘cancel(index)’ in the drop down menu.
- If you wish to Kill the referenda (stop the referenda without slashing the decision deposit bonded by the proposer), then select ‘kill(index)’ in the drop down menu.
- Enter the index number of referenda you wish to cancel. i.e. If you wish to cancel referendum 256, you will enter ‘256’ in the index dialog box.